This blog details the steps required to setup OAuth Client Credentials for Invoking Oracle Integration Endpoints. The official documentation could be found here.
Access the Identity Domain
Log in to the Oracle Cloud Infrastructure Console with your identity domain administrator credentials.
In the navigation pane, click Identity & Security.
Click Domains.
Select your compartment.
Click the identity domain.
In the navigation pane, click Integrated applications.
This is the location at which you create the client application for your grant type.

Configure the client application
Click Add application.

Select Confidential Application, then click Launch workflow.

Enter a name and Description. Eg : OIC-OAuth-<ENV>
The remaining fields on this page are optional and can be ignored.
Click Next.

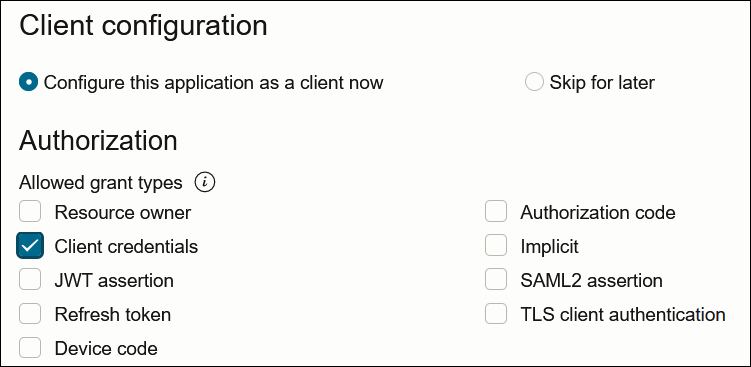
In the Client configuration box, select Configure this application as a client now.

Select the Client credentials in the Allowed grant types section.
Leave the Redirect URL, Post-logout redirect URL, and Logout URL fields blank.

For Client type, ensure that Confidential is selected.

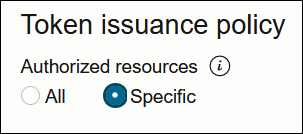
Bypass several fields and scroll down to the Token issuance policy section.
Select Specific in the Authorized resources section.

Click the Add Resources check box.
Click Add scope.
Find the Oracle Integration application for your instance, and click the down arrow. Select the two scopes appended with the following details:
urn:opc:resource:consumer::all
ic/api/

Click Add. The scopes are displayed in the Resources section. Copy the Scope which ends with urn:opc:resource:consumer::all . This will be used to obtain the token.
Ignore the Add app roles check box. Click Next, then click Finish.
Click Activate, and then Activate application to activate the client application for use.

In the General Information section, note the client ID and client secret values. These values are required for the third-party application that is communicating with OIC.
Add roles to the client application
In the navigation pane, click Oracle Cloud Services.

Select the specific application corresponding to the Oracle Integration instance.
In the navigation pane, click Application roles.
Expand ServiceInvoker, then click Manage next to Assigned applications
Note : If there is a requirement to invoke OIC Factory API’s then add the application to ServiceDeveloper as well
Click Show available applications.
Select the application you just created and click Assign, then click Close.

OAuth Client Credentials
Share the following details to the team who would like to invoke the OIC Intergation Endpoints
Access Token URL: https://<IDCS URL>/oauth2/v1/token
Client ID : <generated earlier>
Client Secret : <generated earlier>
Scope : that ends with urn:opc:resource:consumer::all

